

Mac Everywhere, On Whatever Display
Use MeowDisplay to mirror, extend or view individual Mac windows on your iPhone or iPad. Control your Mac with touch, a trackpad-style pointer, shortcuts and a keyboard. Another Mac can also act as a receiver; Android is available through closed testing.
Website · Features · Setup · Support · Privacy · Support on Ko-fi
Download MeowDisplay 2.0 for Mac ·  ·

Mac 2.0.0 stable, shares and receives (macOS 14+) · Mac Receiver 2.0.0 (macOS 12+) · iPhone/iPad 2.0.0 on the App Store · Android 2.0 in Google Play closed testing, not yet public · All downloads
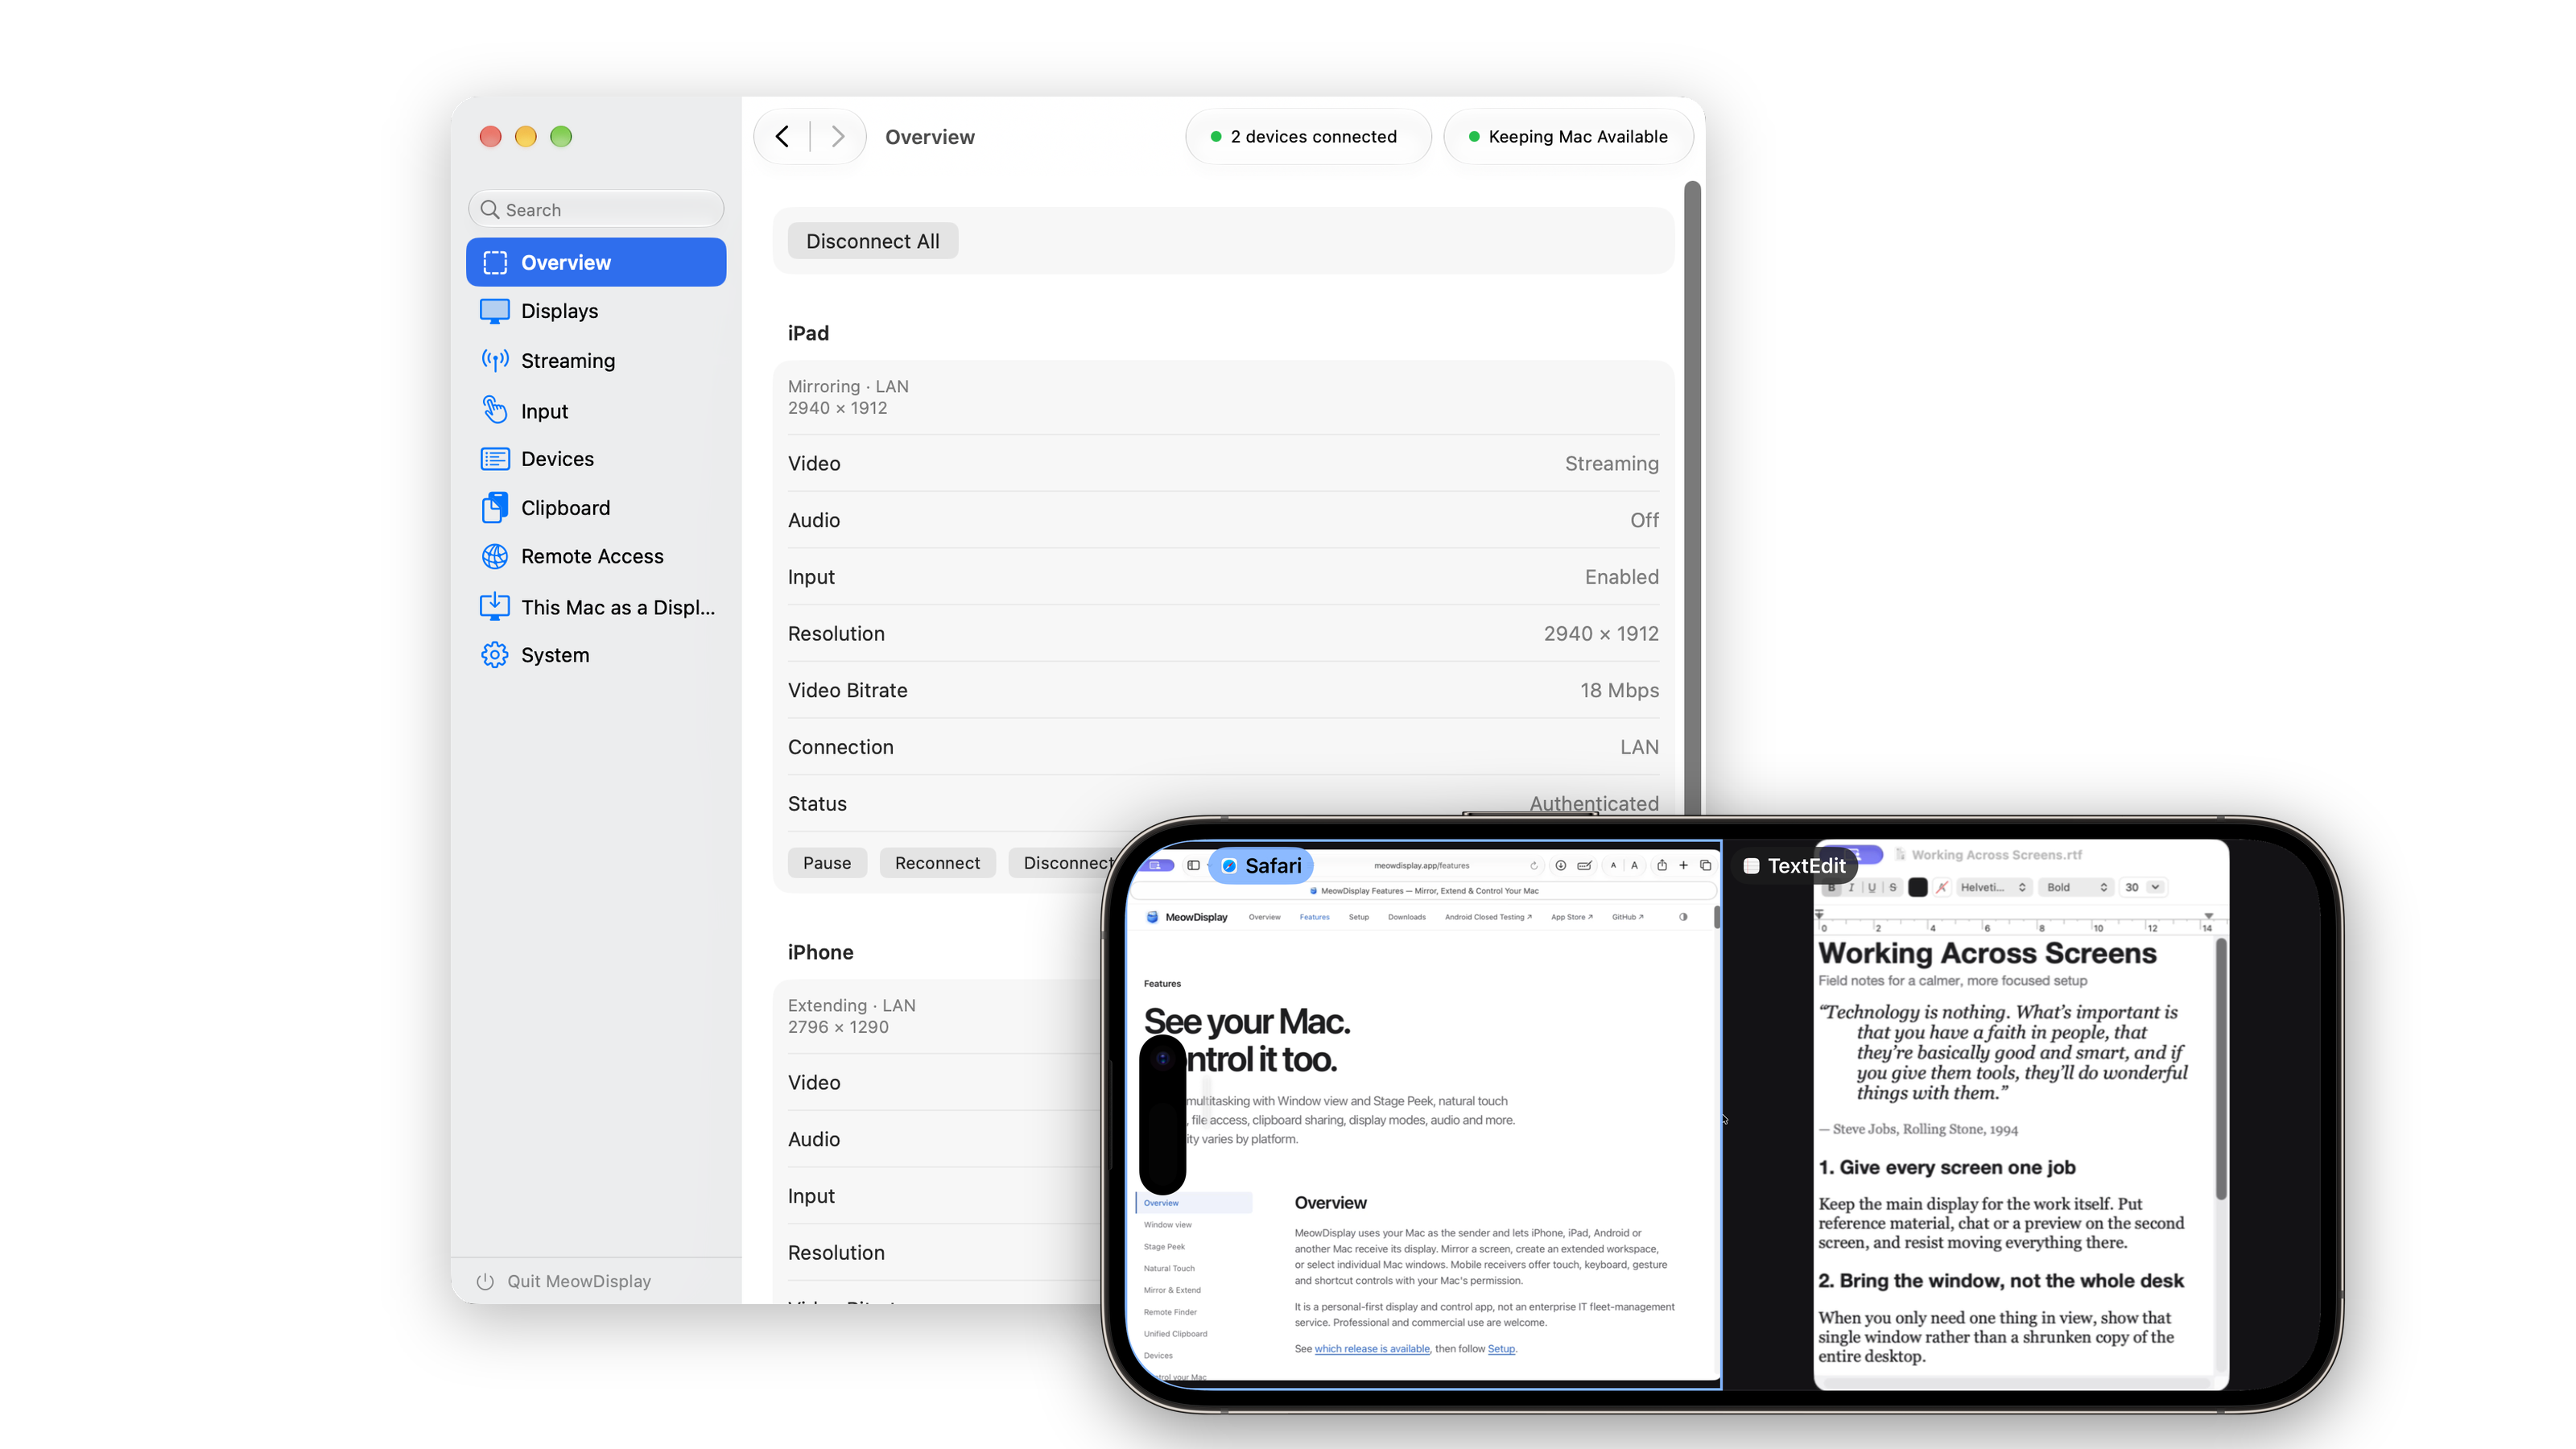
The released Mac app and iPhone Window view, shown in the 2.0 press-kit composition · See the original iPhone screen
MeowDisplay sends your Mac's display to an iPhone, iPad, Android receiver or another Mac. Choose Mirror, Extend or Window view for each device. Mobile receivers have touch, keyboard, pointer and shortcut controls.
Connect over USB (iPhone/iPad), local Wi-Fi or a private network you control. Devices must pair, and sessions are encrypted. You don't need a MeowDisplay account or hosted relay. Mac-to-Mac keyboard and trackpad forwarding is implemented, but physical verification with two Macs is still pending.
Mac and iPhone/iPad 2.0.0 are released. Android 2.0 remains in Google Play closed testing.
| Platform | Available version | Get it |
|---|---|---|
| Mac app · macOS 14+ · share or receive | 2.0.0 stable | Download MeowDisplay · release notes |
| Receiver-only Mac app · macOS 12+ | 2.0.0 stable | Download MeowDisplay Receiver |
| iPhone / iPad · iOS / iPadOS 16.4+ | 2.0.0 on the App Store | App Store |
| Android · Android 10+ | 2.0 Google Play closed testing (not public) | Join closed testing |
The main Mac app includes both sharing and receiving: share this Mac's display, or use this Mac as another Mac's display. The separate Receiver-only app is also available for Macs running macOS 12 or later. Android 2.0 requires the Mac 2.0 app. Checksums and current installers are listed on the official downloads page.
Version 2.0 adds Window view, Stage Peek and more ways to control a Mac from a phone. The main changes are:
- Window view: arrange the Mac windows you choose in panes on the receiver.
- Stage Peek: hold the edge to find and switch windows or show the full desktop.
- Natural Touch: an optional direct-touch style for tapping, scrolling, dragging and right-clicking. Classic and Trackpad remain available.
- Per-device display modes: choose Mirror, Extend or Window view independently for each receiver.
- Android receiver: Android 2.0 is available through Google Play closed testing, not public release.
- Files and clipboard: Remote Finder and Unified Clipboard on the mobile receivers, with separate permissions granted by the Mac owner. Clipboard sharing starts off on both sides.
- Privacy Shield: cover the Mac's physical screens during remote use. It is a viewing shield, not a lock; see the limitations.
- One Mac app, both roles: the main Mac app shares and receives. A separate Receiver-only app remains available for macOS 12+.
- Mac Receiver input: control the sending Mac with the receiving Mac's keyboard and trackpad after requesting control.
- Remote Access: reach a paired Mac over a private network you set up, including supported Tailscale routes. There is no public Internet discovery.
The iPhone and iPad apps also provide a Text Bar and Zoom While Typing, which keeps the active line enlarged on the receiver.
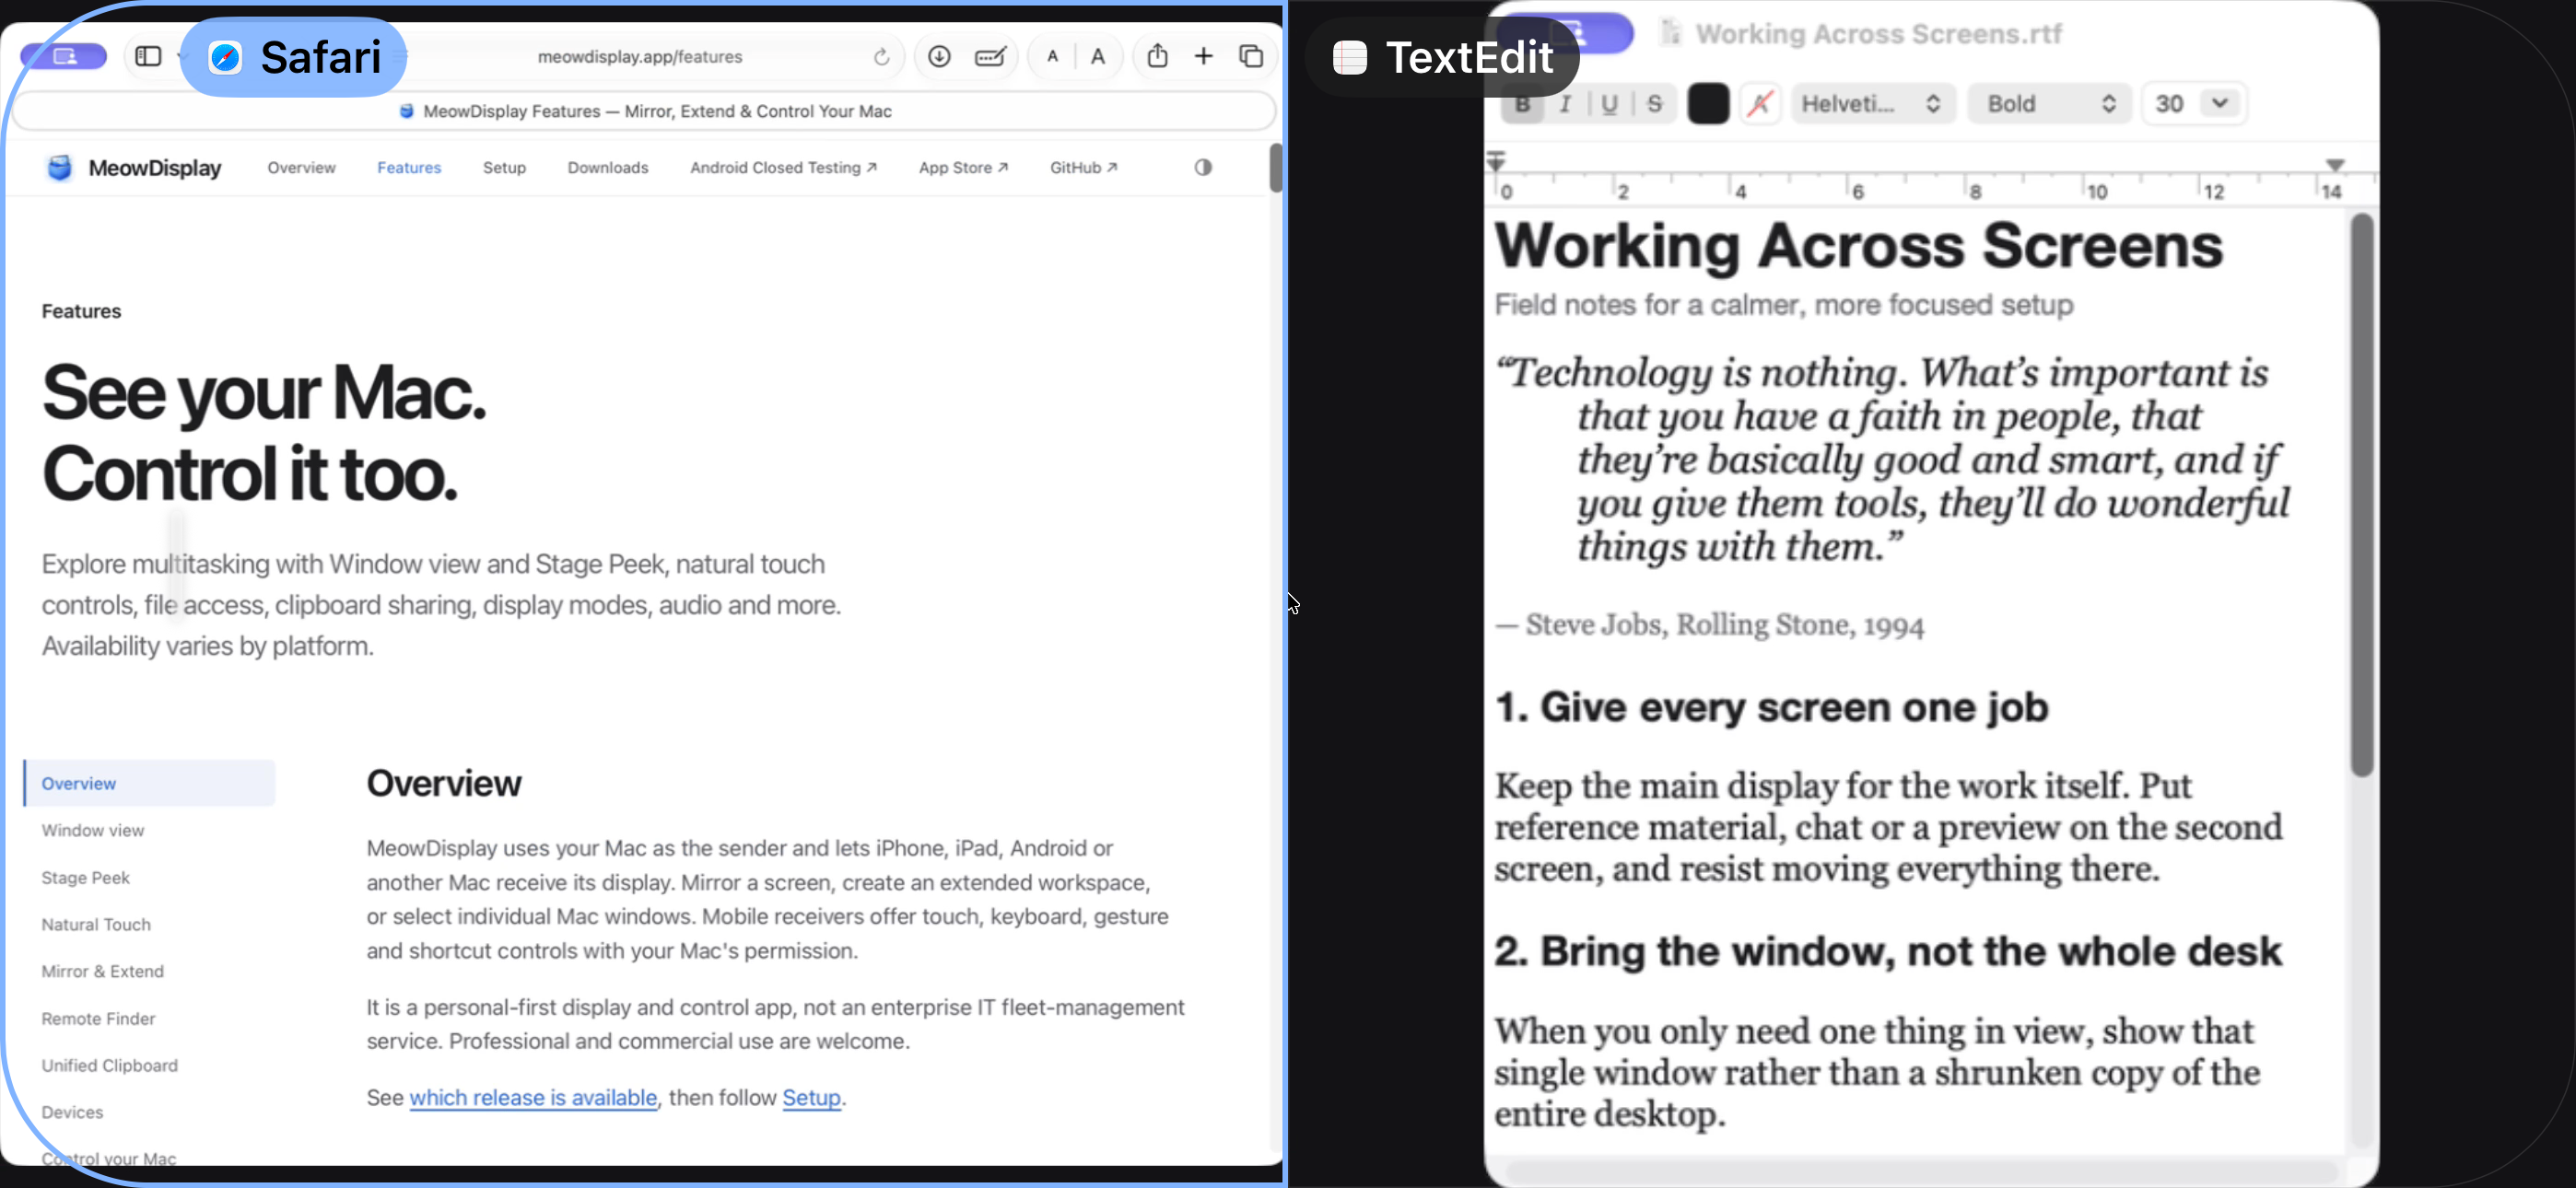
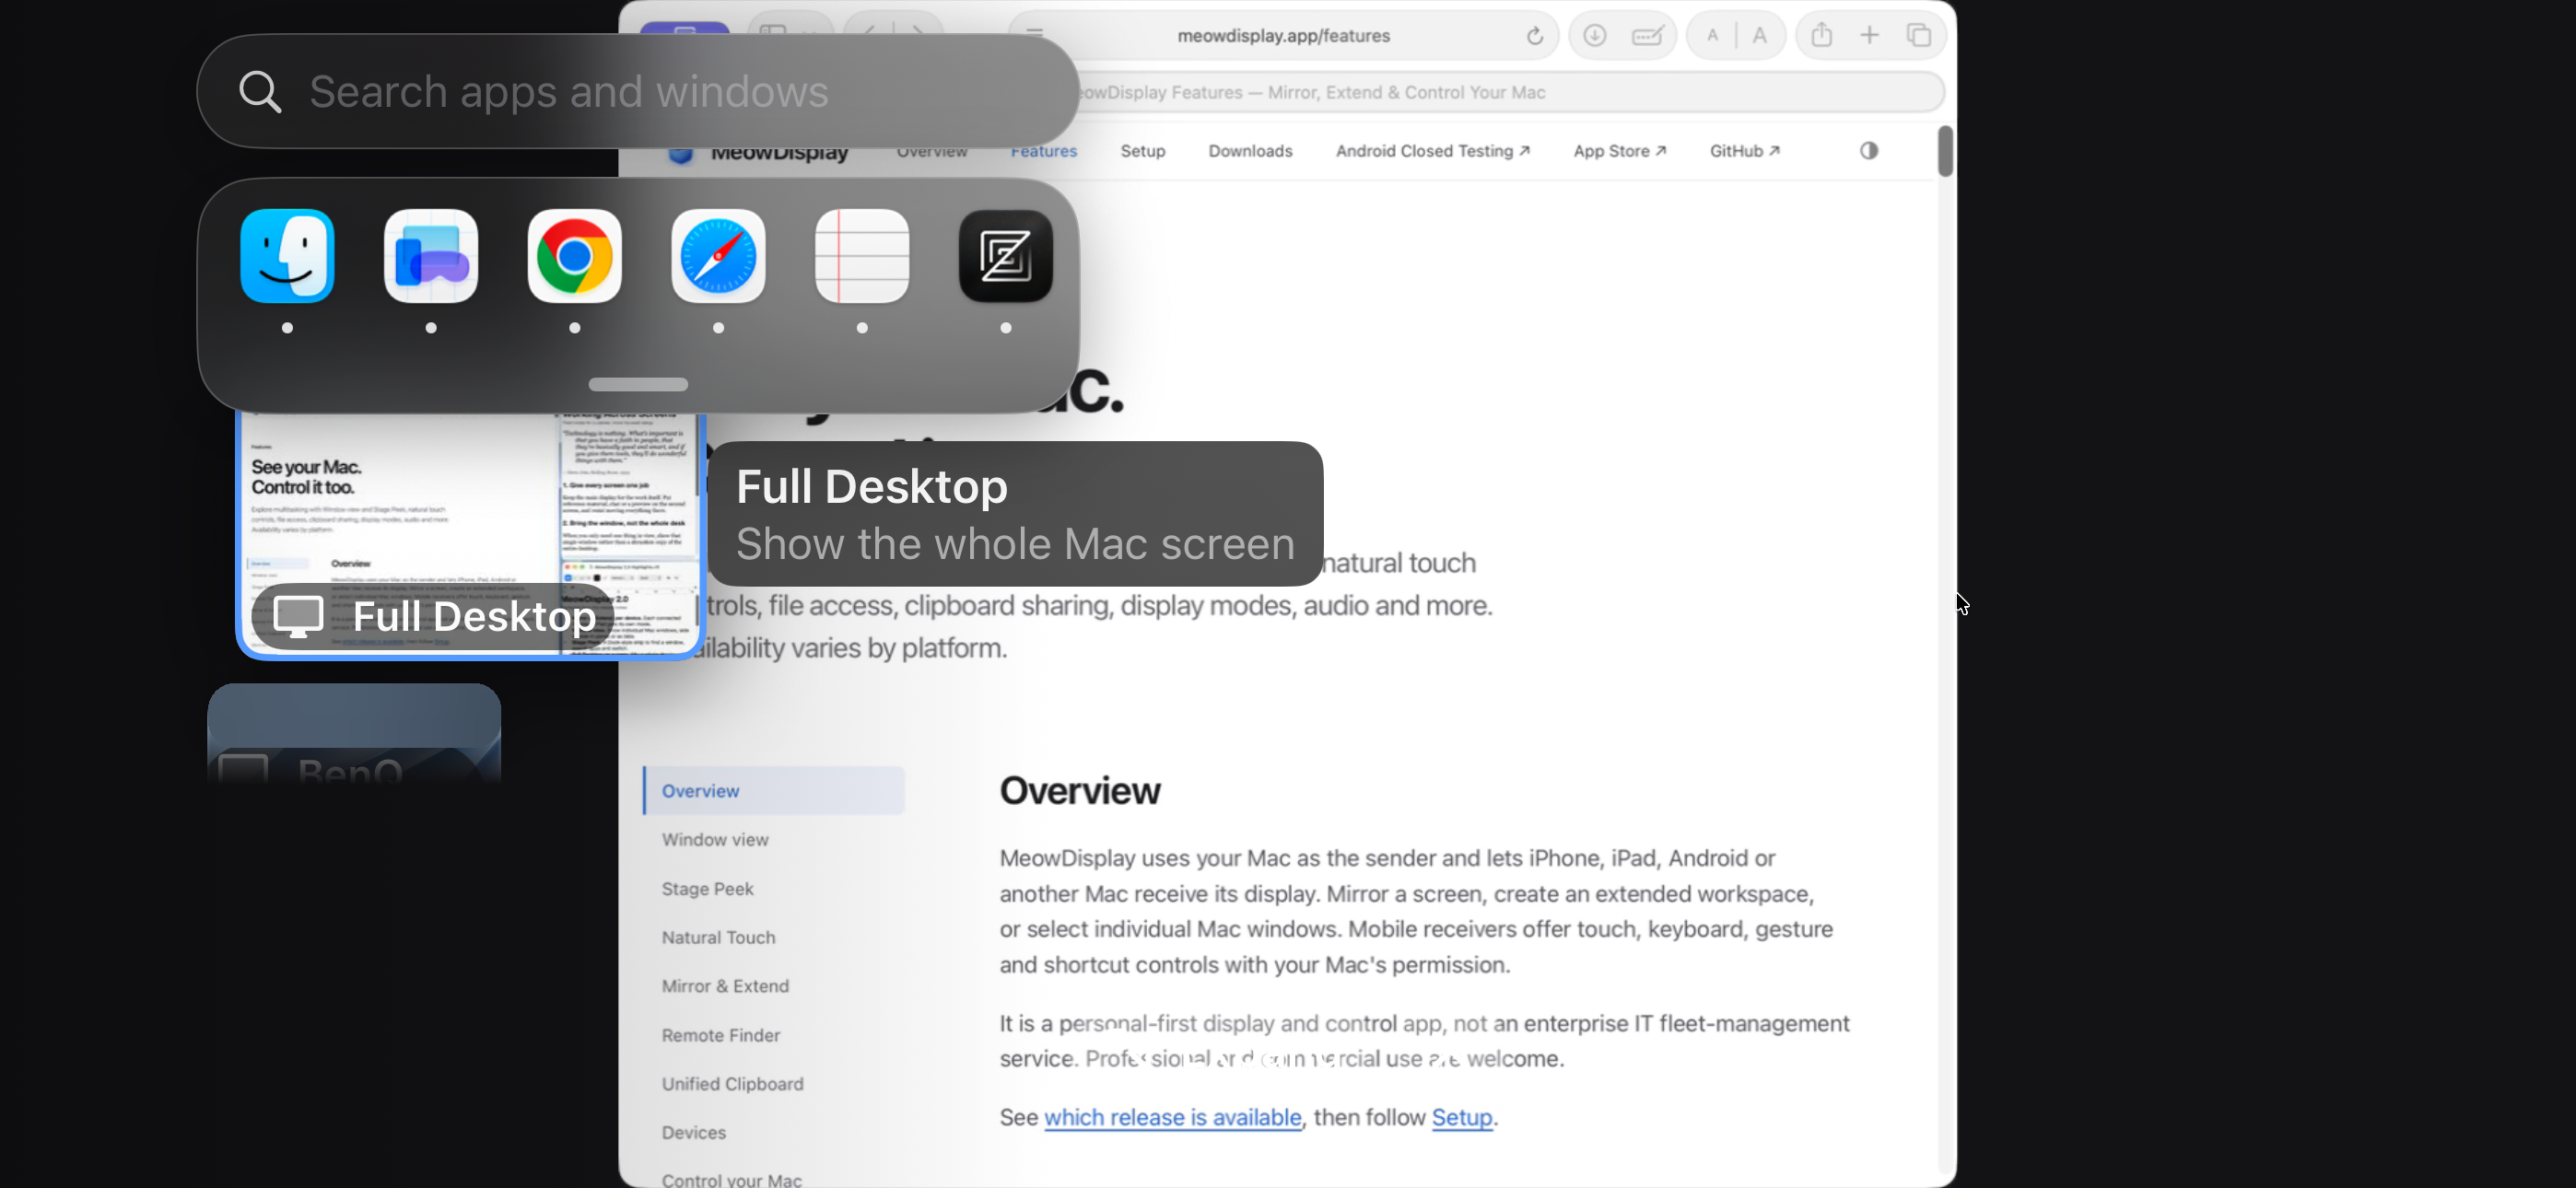
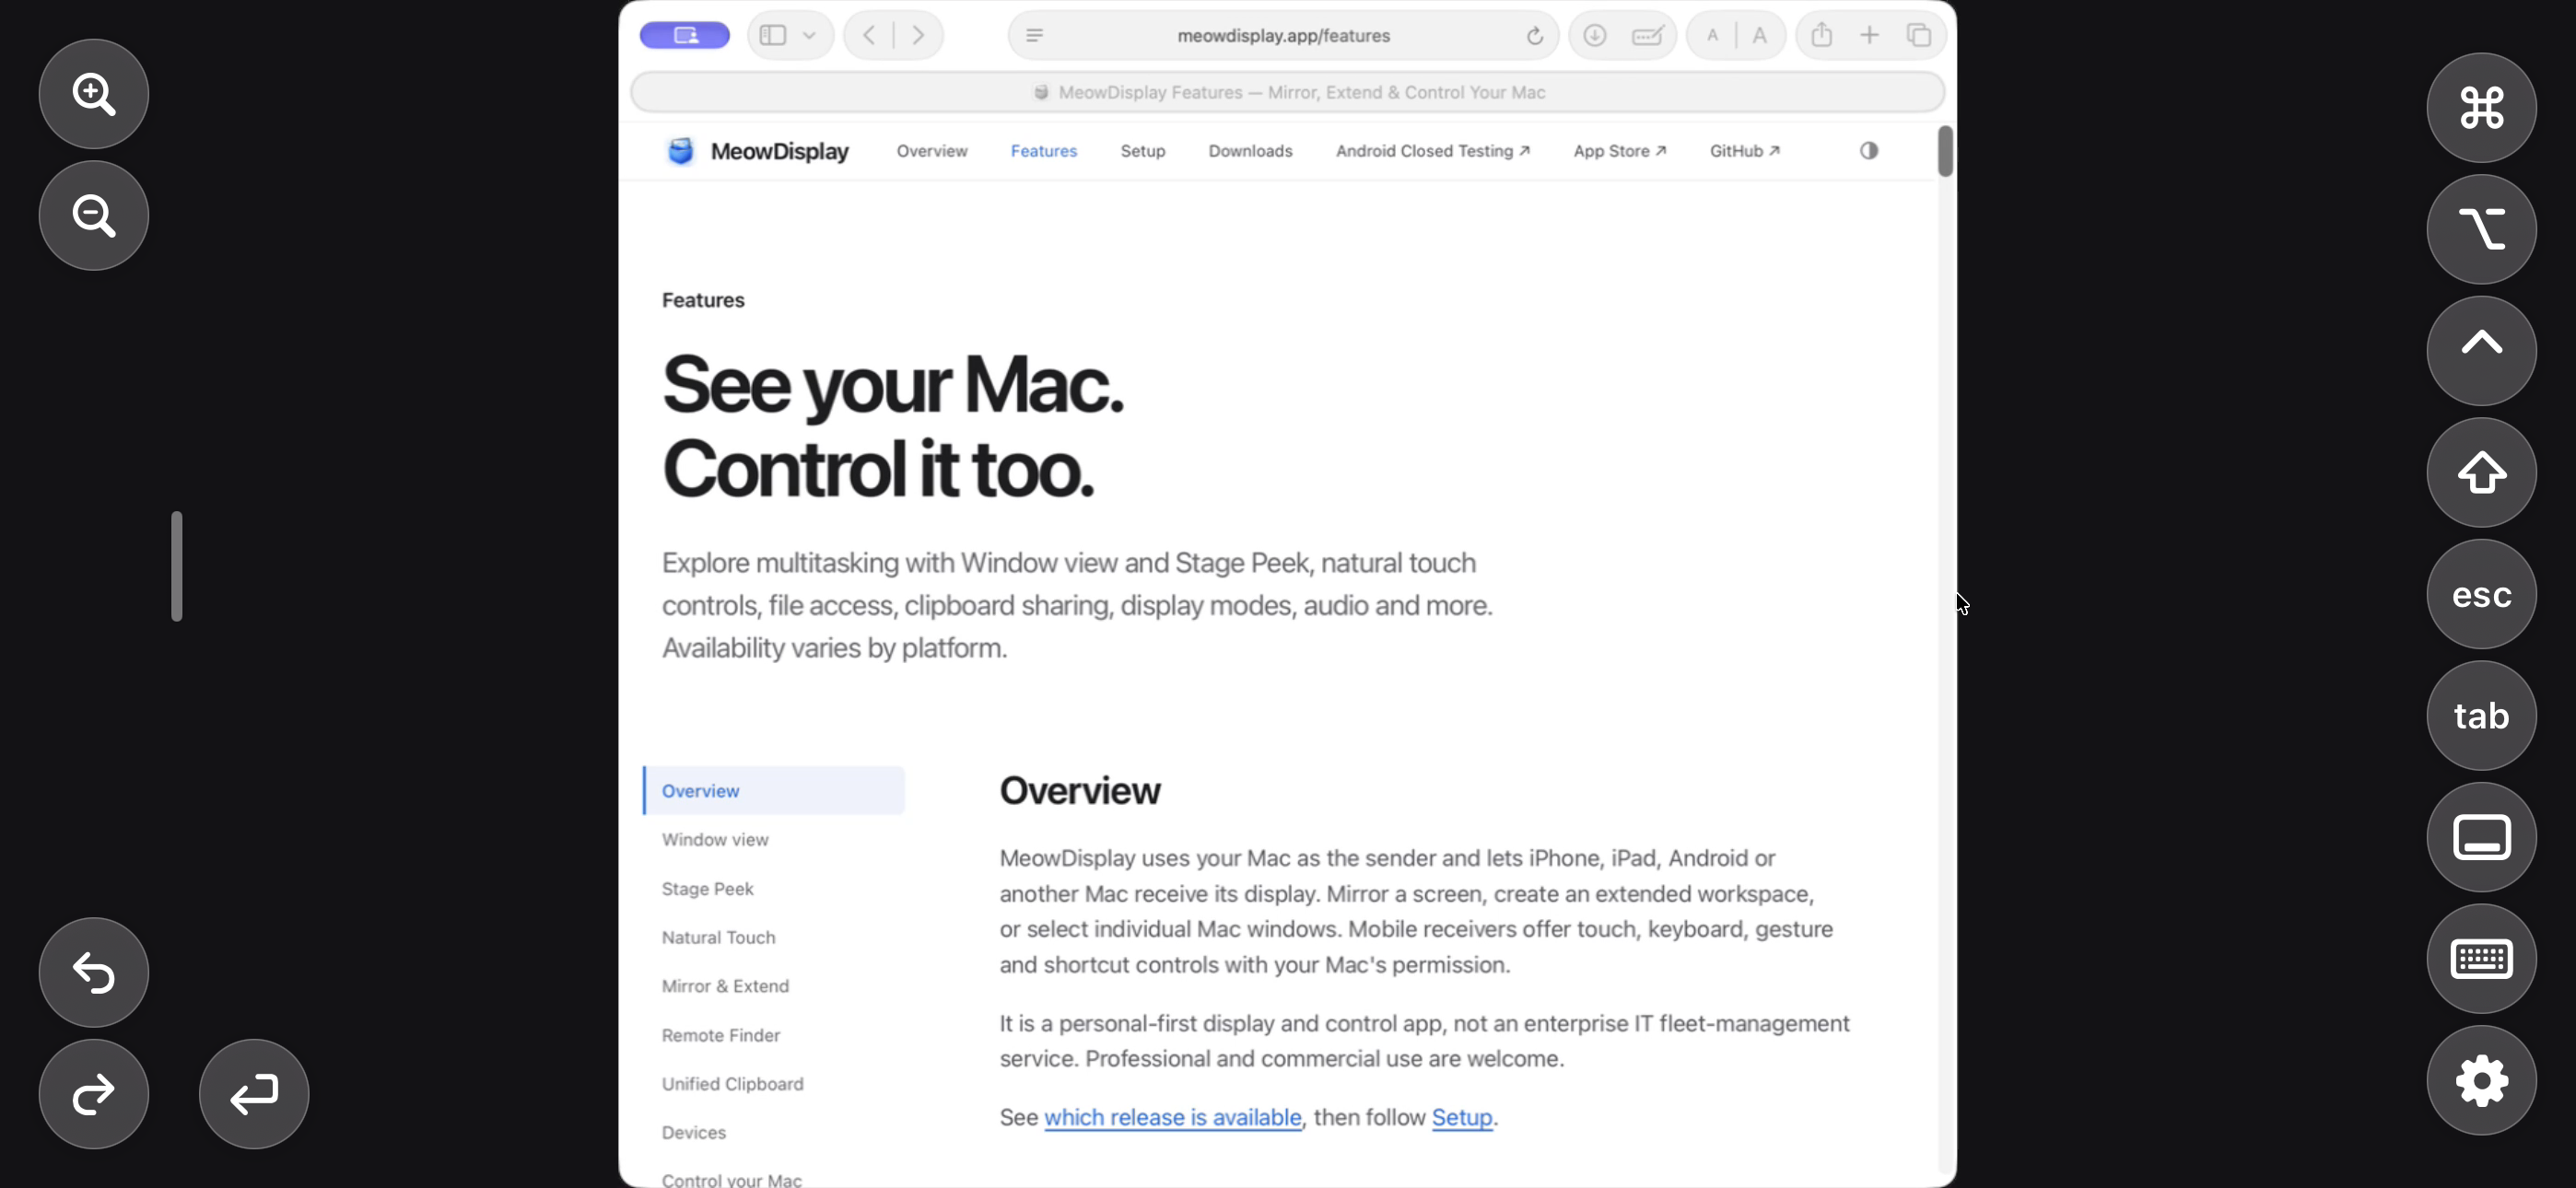
Window view · Stage Peek · Control Tray. These press-kit mockups frame the real 2.0 iPhone screenshots. Select one to inspect the original, unframed interface.
| Display | Mirror an existing Mac display · Extend with a separate virtual workspace · Window view: the Mac windows you pick, side by side · clamshell and headless workflows |
| Control | Direct Touch (Natural Touch or Classic) · Trackpad · Precise Control in Classic and Trackpad · Smart Touch (Experimental, Classic) · keyboard · Apple Pencil · Mac gestures |
| Devices & permissions | Active Display · Known Devices · Nearby pairing · connection policies · Allow Input and per-session control requests |
| Picture in Picture | Keep a View Only window of the live Mac on screen while you use other apps (iPhone and iPad) |
| Shortcuts | Main Control Tray · Function Tray · Chords and modifier palettes · customizable actions · profiles · Auto-hide |
| Connections | USB · local Wi-Fi · Remote Access · Auto-Reconnect · Wake & Connect |
| Audio | Mac system audio on the receiver · Mac keeps playing locally · A/V sync and Resync |
| Security | Trusted pairing with a matching code · TLS 1.3 · pinned peer identity |
| Receivers | iPhone and iPad · Android in closed testing · another Mac using the main app's receiver role or Receiver-only app, with keyboard and trackpad control (physical two-Mac input verification outstanding, #12) |
MeowDisplay is for using your own Mac from a smaller screen, especially an iPhone. The controls are designed for touch, and Window view lets you focus on individual apps instead of shrinking a whole desktop.
- Mirror or Extend. View an existing display, or create a separate virtual desktop that macOS can arrange alongside other displays.
- Control from a phone. Use touch styles, a trackpad-style pointer, gestures, shortcut trays and a keyboard.
- Use your own network. Connect over USB, local Wi-Fi or a private-network route that you configure. No MeowDisplay account or hosted relay is required.
- Personal use first. This is for accessing your Mac from another screen, not for enterprise fleet management.
Comparing it with Sidecar, Duet Display, Luna Display, Astropad or Jump Desktop? These apps handle different devices and workflows. MeowDisplay is free and open source, offers Mirror and Extend, and requires you to set up your own network route for Remote Access. See the setup FAQ before choosing an option.


Mac display settings: Mirror (left) and Extend (right). See Extend running on an iPad.
- Mirror shows an existing Mac display on the receiver. With multiple physical displays connected, choose which one to share. Mirror needs an active display to copy.
- Extend creates a separate software virtual display. Move windows onto it and arrange it alongside your other displays in macOS. Where supported, Extend shape controls include Use Full Display.
Choose the mode on the Mac, or request a switch from the receiver's Settings; the Mac confirms the change. Extend also supports clamshell and headless workflows without a dummy display adapter. Keep a closed MacBook connected to power; headless compatibility is still being tested across Mac models.
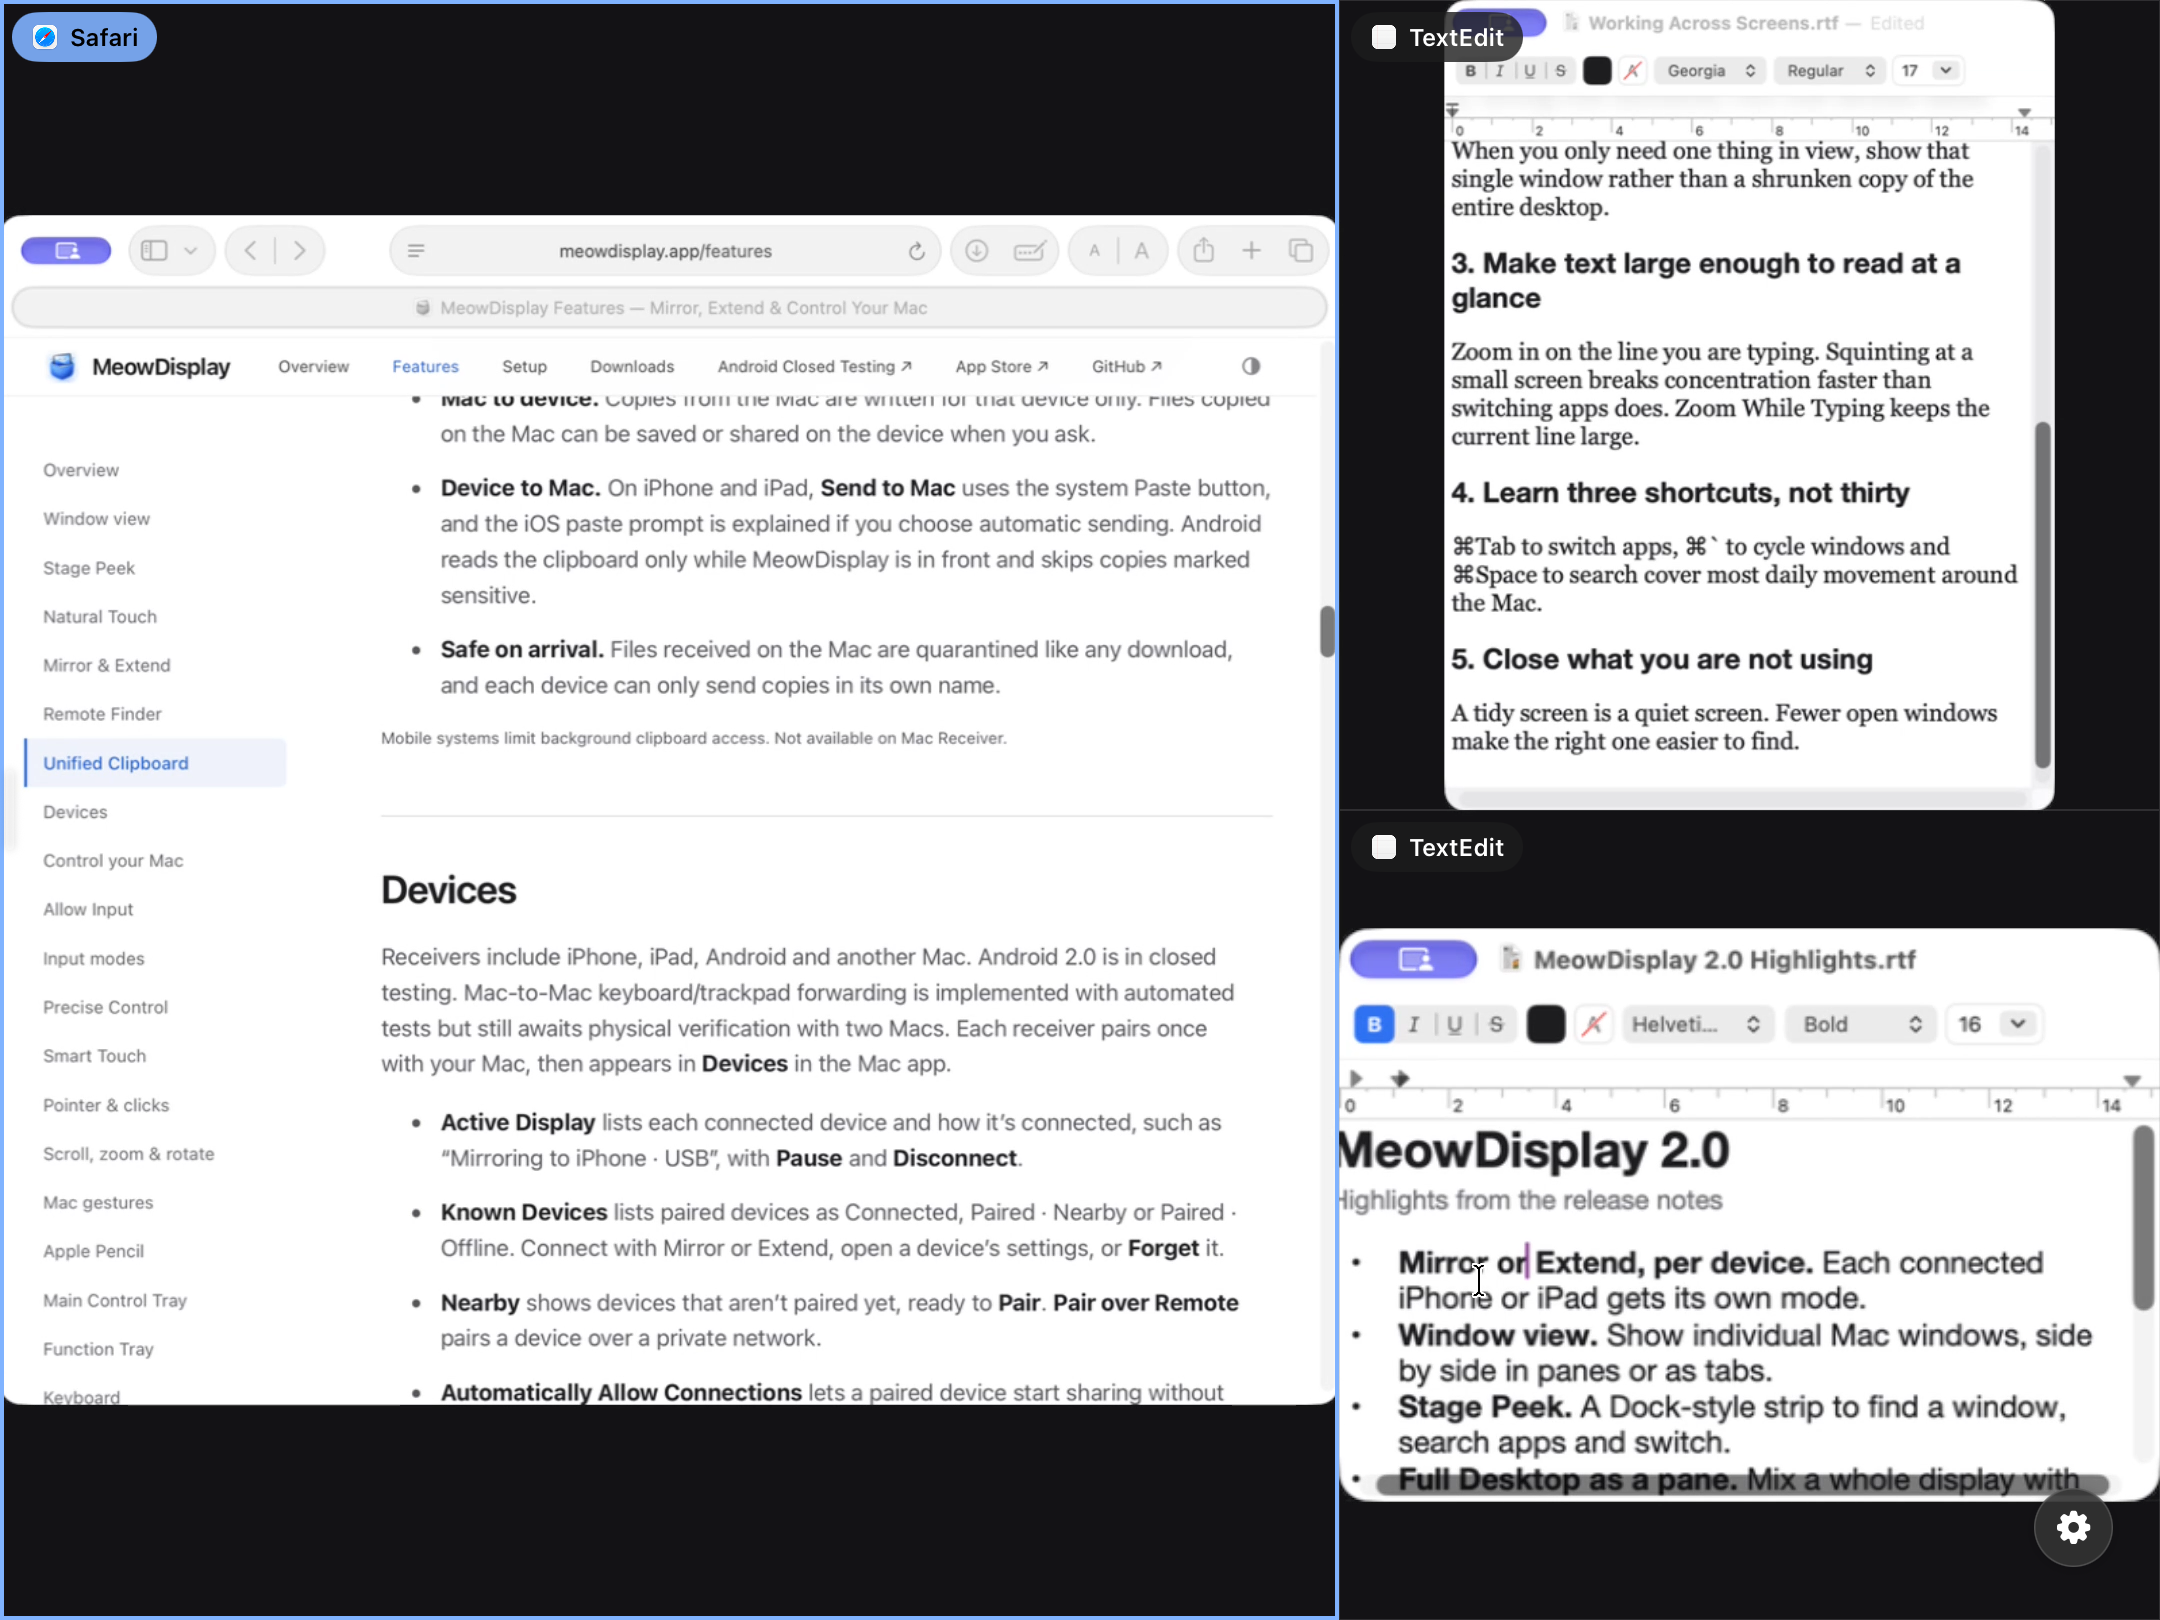
Choose Windows to arrange selected Mac windows in panes on a receiver. Each device has its own display mode, so switching one does not change the others.
Three-pane Window view on an iPad (9th generation) · Open full-resolution screenshot
- Tiles. One window is the default. Every receiver supports up to 9 panes, including phones; the available space and minimum pane size decide how many can be shown.
- Choose windows. Hold three fingers still on the picture, or use Settings → Display → Show Mac Windows…. On the Mac Receiver, use Windows in the title bar or ⌃⌥W.
- Typing. One pointer works across the tiles; keys go to the tile you selected, and only while its app is in front on the Mac. Control needs the same session permission as always, and a View Only session can arrange tiles but sends nothing.
- Safe by default. Removing a tile never closes the Mac window. Close Window on Mac… is separate and asks first. A Mac can turn Window mode off under Settings → Displays → Windows.
Stage Peek is the default Window view switcher. Hold the left or right edge, then slide to find a window or tap to switch. You can search running apps and use Full Desktop to return to the complete Mac screen. From there, Switch to Window view? offers a way back once per launch.
The optional Rail switcher is under Settings → Controls → Window Switcher. See WINDOW_MODE.md for pane and switching behavior.
Remote control requires Allow Input on the Mac, Accessibility permission, and permission for the current session. Pausing the stream also pauses input. Choose an input mode in the receiver's Settings:
- Direct Touch — a touch maps to the matching position on the Mac screen. Choose a Touch Style: Natural Touch taps to click, swipes to scroll, presses then moves to drag and touches and holds to right-click; Classic keeps the finger as the pointer (tap, then hold and move, to drag) and is where Smart Touch applies.
- Trackpad — the pointer moves relatively, like a MacBook trackpad. Touching doesn't jump the cursor to that spot. Trackpad Sensitivity is adjustable, and multi-finger gestures keep working.
Phones initially use Trackpad; iPads and Android tablets initially use Direct Touch. Classic is the default Direct Touch style; Natural Touch is an optional style. Saved choices can differ.

Mac Input settings: allowing connections does not grant control.
Allow Input is the Mac-wide master switch. Receivers can stay connected and view the Mac while it is off. Every new logical session starts with input off; connecting never grants control.
Use Request Control in the receiver's Settings. The device's Input Requests policy on the Mac decides what happens:
- Ask prompts on the Mac.
- Always Allow Requests skips the prompt, but the receiver still has to ask each session. It never bypasses Allow Input.
- Never Allow Requests rejects requests.
Until effective input is allowed, the receiver's control tray is unavailable; the Settings gear stays reachable. The Mac can Revoke Control in the device's settings, or the receiver can Turn Off control. These permissions are separate from permission to connect.
A touch that control doesn't allow shows a brief Request Control prompt; it never changes a setting on its own. Requests are only sent automatically when you turn on Request Control Automatically for that Mac, and the Mac still decides.
Local view navigation is separate from input. With Allow Local View Navigation on (the default), you can pan, zoom, rotate and reset the view on the receiver even while input is off — nothing is sent to the Mac. On iPad, Move View lets one finger pan and a pinch zoom without touching the Mac at all.
Precise Control works in Classic Direct Touch and Trackpad. Keep one finger down and use another to fine-tune and click at the pointer. There's nothing to turn on. In Natural Touch a second finger during a swipe or drag is ignored.
- In Classic Direct Touch, the first touch places the pointer at that position. Keep it down for a moment, then add another finger: movement becomes relative for the rest of that touch sequence. Move either finger to fine-tune; the pointer never snaps back under it. Lift every finger and the next Direct Touch starts normally again.
- In Trackpad, movement is already relative from the first touch. Rest one finger, then use another to click or drag at the existing pointer location. There is no absolute-to-relative transition, and Trackpad Sensitivity still scales pointer movement.
- In either mode, tap the added finger to click, double- or triple-tap for multiple clicks, or tap, then hold and move, to drag. With one finger resting, tap two more fingers together to right-click.
See Precise Control for the full gesture details.
Smart Touch (Experimental) is an optional addition to Classic Direct Touch (Touch Style: Classic), on by default and easy to turn off in the receiver's Settings. It uses the Mac's Accessibility information to recognize supported scrollable areas and window title bars:
- Swipe a scrollable area with one finger, with momentum in either axis.
- Hold a standard window's title bar or empty toolbar space, then drag to move the window after the confirming haptic.
- Hold still before moving in a scrollable area to use ordinary Direct Touch instead. Smart Touch Haptics controls the hold feedback.
It works best with standard macOS accessibility information and falls back to Direct Touch when it cannot identify the target. It has no effect in Natural Touch or Trackpad mode. Reliability and stability are still being improved; it does not understand every interface. More on Smart Touch.
The one-finger rows describe Classic and Trackpad. In Natural Touch, a swipe scrolls, press then move drags, and touch and hold right-clicks.
| Gesture | On your Mac |
|---|---|
| Tap | Click |
| Double tap | Double-click |
| Triple tap | Triple-click |
| Tap, then hold and move | Left drag |
| Two-finger tap | Right-click |
| Two-finger tap, then hold and move | Right-button drag |
| Two-finger pan | Scroll, with momentum |
| Pinch / spread | Viewport, App, or Disabled |
| Two-finger rotate | Viewport, App, or Disabled, with optional Snap Rotation |
| Two-finger double tap | Reset or restore the viewport zoom and pan |
| Gesture | On your Mac |
|---|---|
| Three-finger swipe up | Mission Control |
| Three-finger swipe down | App Exposé |
| Three-finger swipe left / right | Next / Previous Space |
| Three-finger tap | Spotlight |
| Four- or five-finger spread | Show Desktop |
| Four- or five-finger pinch | Launchpad |
Full details are on the Features page.
Use Apple Pencil for precise input on supported iPad models:
- Pencil strokes reach the Mac as pen-tablet events, separate from finger input
- Tilt is passed through with each stroke
- Hover moves the pointer before the tip touches, on iPads that support Pencil hover
- Strokes are sent at the iPad's full touch sample rate
- Fingers resting on the screen are ignored while the Pencil tip is down
- Tap and double-tap with the tip to click and double-click
Apple Pencil support is still evolving, with additional capabilities and refinements planned for future releases.
Turn Video off and keep using MeowDisplay for pointer and keyboard input. The connection, trays and selected input mode stay active, so the receiver works as a trackpad and keyboard for the Mac.
Tap the tray's Keyboard button for the on-screen keyboard, or connect a hardware keyboard to the iPhone or iPad. In 2.0, the hardware keyboard's arrow keys, Escape, Tab and Forward Delete are forwarded to the Mac while remote input is allowed. Latched modifiers from the Control Tray combine with the keys you type.
The Main Control Tray puts Command, Option, Control, Shift, Escape, Tab, Dock, Keyboard and Settings on the receiver. Reorder or hide buttons and save different profiles. You can also choose haptics, the tray side in landscape, and Avoid Notch.
The iPhone Control Tray screenshot shows the actual controls without the device frame.
Hold or latch a modifier and a palette of matching shortcuts appears beside it. Combine modifiers and the palette changes with the chord — for example ⌘ for Copy, Paste and Undo, ⌘⌥ for Force Quit and Hide Others, ⌘⇧ for Redo and Screenshot. Pick commands without reaching for a physical keyboard, and choose which actions each palette offers.
A separate tray of one-tap actions — Zoom In, Zoom Out, Undo and Redo by default. It's customized independently of the Main Control Tray, with its own profiles, and can sit on the same or the opposite side.
Add, remove, reorder and rename its actions, and give each one a face — an SF Symbol, text, an emoji, or its keys. Custom actions can be one-tap keyboard shortcuts (including multi-key chords) or short sequences of existing actions, and chord palettes can offer them too.
On iPad, choose how the controls sit around the Mac:
- Strip — a solid rail on any edge, with the Mac's picture fitted beside it.
- Overlay — the Mac fills the screen and the controls float over it in compact trays.
- Custom — up to five layouts of your own, with separate landscape and portrait arrangements, built in a full-screen visual editor with Preview, alignment guides and snapping. Layouts can be shared as a code and imported on another iPad.
The Main and Function controls pick their edges independently, Control Size scales them, and Two-Hand Assist puts helper modifiers on the opposite side. While the on-screen keyboard is up, a keyboard accessory bar with modifiers, Escape and Tab takes the controls' place. iPhone keeps the Control Trays above.
Auto-hide hides the control trays after a period of inactivity and brings them back when you interact with the receiver. Manual Collapse works separately. You can turn Auto-hide off.

Mac Devices settings: manage existing pairings and discover receivers.
Pair a receiver once, then manage it in Devices on the Mac:
- Active Display shows live receiver/display sessions and connection state, with Pause and Disconnect.
- Known Devices includes paired receivers that are Connected, Paired · Nearby, or Paired · Offline. When reachable, connect with Mirror or Extend. Open device settings or Forget a pairing.
- Nearby lists unpaired discoverable receivers ready to pair.
Connection permissions decide whether a paired device can start sharing. Automatically Allow Connections is on by default. Each device can use Default (follow that switch), Always Allow, or Block. Blocking keeps the pairing. These choices never grant remote control.
Either side can start a session, and the Mac sender always streams. When connection approval is required, an explicit Connect waits for acceptance; background reconnects never prompt.
Receivers include iPhone, iPad, Android (closed testing), and another Mac using the main app's receiver role or the separate Mac Receiver. Once the sending Mac allows control, the receiving Mac's own keyboard and trackpad drive it while the video window is in front; press ⌃⌥⎋ to pause. More on Devices.
- USB — plug in a data-capable cable and trust the Mac. A direct, reliable path with no network setup.
- Local Wi-Fi — receivers are discovered over Bonjour on your network, including nearby peer-to-peer Wi-Fi.
- Remote Access — reach a paired Mac through a private network you control, such as Tailscale. The address only routes the connection; pairing still authenticates it.
- Network Transport — on Wi-Fi and Remote Access, each device can use Auto (the default), QUIC or TCP (Mac Settings → the device). Both use the same pairing and encryption; Auto uses QUIC when both apps support it and uses TCP if QUIC can't get through. USB is unaffected.
- Auto-Reconnect restores the session whenever the connection becomes available again.
- Wake & Connect can wake a supported paired Mac on its network and reconnect when it becomes available. It needs Wake for Network Access and compatible hardware, and is designed for a logged-in Mac that has gone to sleep or locked. See Setup for networking limitations.
Mac system audio can stream to the receiver while the Mac keeps playing locally. Turn it on with the receiver's Audio toggle; if sound and picture drift apart, adjust A/V Sync or tap Resync.
On iPhone and iPad, the Mac can stay in view while you do something else. MeowDisplay uses the system's own Picture in Picture window, fed by the same stream the receiver is already showing.
- Automatic or manual. With Picture in Picture on (the default), a live session can enter the system floating window when you leave the app, when supported and available. Receiver Settings also offers Start Picture in Picture and Stop Picture in Picture.
- For glancing, not controlling. The window is View Only: it shows what your Mac is doing, but touches in it never reach the Mac. All interaction stays in the full receiver.
- One tap back. The window's restore button returns you to the full receiver, and opening MeowDisplay again does the same.
- Audio. If the receiver's Audio is on, Mac audio can keep playing while the window is showing. Leaving the app without Picture in Picture still silences the receiver as before.
- Your choice. Turn Picture in Picture off in the receiver's Settings and leaving the app never starts it.
Picture in Picture is new; physical-device validation is not yet complete.
- Devices pair explicitly, confirming a matching verification code (SAS) on both screens.
- Every session is encrypted and mutually authenticated with TLS 1.3 against the pinned peer identity you trusted.
- There is no plaintext media fallback.
More in SECURITY.md and the Privacy page.
| App | Runs on |
|---|---|
| MeowDisplay (the Mac app for sharing and receiving) | macOS 14 or later |
| MeowDisplay Receiver (a spare Mac as a display) | macOS 12 or later |
| MeowDisplay for iPhone and iPad | iOS / iPadOS 16.4 or later |
| MeowDisplay for Android (closed beta) | Android 10 or later; Mac 2.0 sender required. Build requirements: AndroidReceiver/README.md; features: PARITY.md |
Remote control of the Mac needs Accessibility permission; capturing a display needs Screen Recording.
The links in Platform availability install stable 2.0. The main Mac app can share and receive; choose the separate Receiver-only app when that is all the Mac needs.
Mac, with Homebrew (optional): signed and notarized, macOS 14 or later.
brew install --cask raiseCatError/tap/meowdisplayThat one command adds the tap
and installs MeowDisplay into /Applications. Update with
brew upgrade --cask meowdisplay; remove with brew uninstall --cask meowdisplay
(add --zap to also delete preferences and caches). To use a spare Mac
(macOS 12 or later) only as a display, install the receiver:
brew install --cask raiseCatError/tap/meowdisplay-receiver.
Mac, direct download: get MeowDisplay.dmg (or MeowDisplayReceiver.dmg)
from the 2.0.0 release
and drag the app to Applications.
iPhone and iPad: install MeowDisplay from the App Store (iOS or iPadOS 16.4 or later).
- Download MeowDisplay 2.0 for Mac, open the DMG, drag MeowDisplay to Applications and open it.
- Install MeowDisplay from the App Store on your iPhone or iPad and open it. Android 2.0 is in closed testing. To receive on another Mac, install the main app or the Mac Receiver 2.0.0 (macOS 12+).
- Connect over USB or Wi-Fi, and pair the devices by confirming the matching code.
- Choose Mirror, Extend or Window view.
- Grant Screen Recording and Local Network permissions as requested. For control, also grant Accessibility, enable Allow Input on the Mac, and use Request Control in the receiver's Settings.
The Setup guide covers permissions, pairing, USB & Wi-Fi, Remote Access and troubleshooting.
git clone https://github.com/raiseCatError/meowdisplay.git
cd meowdisplay
echo "DEVELOPMENT_TEAM=YOURTEAMID" > .env
./generate.sh
Open MeowDisplay.xcodeproj and run the OpenSidecarMac scheme for the Mac
app, or OpenSidecariOS for the iPhone/iPad receiver. Signing, permissions and troubleshooting are in SETUP.md.
The release process is in RELEASE.md.
- Features · Setup · Support · Privacy
- SETUP.md — building, signing and local setup
- SECURITY.md — security model and reporting issues
- PROTOCOL.md and COMPATIBILITY.md — wire protocol and versioning
- ARCHITECTURE.md — how the apps fit together and where to start in the code
- WINDOW_MODE.md — Window mode: tiles, switching, limits
- RECEIVER_CONTROLS.md and PARITY.md — what each receiver can do and where its settings live
- AndroidReceiver/README.md — Android build and verification
- PRODUCT_SCOPE.md — product goals, non-goals and idea discussions
- TERMINOLOGY.md — names and copy rules
- TECHNICAL_NOTES.md — virtual displays, sleep and wake, and other internals
Source, issues and releases live at github.com/raiseCatError/meowdisplay. Bug reports, suggestions, documentation updates and pull requests are welcome, especially testing on different devices, Mac models, external-display setups and networks. Our contribution guide has separate forms for bugs, feature requests, exploratory ideas, documentation, and hardware compatibility reports.
Base branches and pull requests on dev, where development happens.
main holds the latest published release source; only approved release
promotions and documentation-only promotions reach it (BRANCHING.md).
MeowDisplay is personal-first, not non-commercial: using it for your own professional or commercial work is welcome. We are not currently planning an enterprise remote-desktop/IT administration suite (discussion #86). Windows, Linux, and hosted account/relay services are separate unplanned ideas, not roadmap commitments. Discussion does not guarantee consideration or implementation.
See PRODUCT_SCOPE.md, CONTRIBUTING.md and the Code of Conduct. Report security vulnerabilities privately as described in SECURITY.md, never in a public issue.
Want to translate MeowDisplay? Community translations are welcome. Human-written translations only, please — no AI or machine-generated localization. See Translations in CONTRIBUTING.md for how to get started.
MeowDisplay stays free and open source. If it helps you, supporting its continued development is appreciated, but entirely optional: Ko-fi · GitHub Sponsors.
Bug reports, translations and help with testing are useful too.
MeowDisplay started as a fork of OpenDisplay by Philip Poloczek. OpenDisplay provided the original foundation for Mac screen capture, virtual displays, video encoding and an iPhone/iPad receiver. Thanks to Philip Poloczek and the OpenDisplay contributors for that work.
Most of MeowDisplay's own work since then has gone into what happens on top of that foundation: Direct Touch, Trackpad and gestures, Smart Touch, Precise Control, the control trays, Remote Access, pairing and security, the session lifecycle, clamshell and headless use, audio, Picture in Picture, and a lot of polish.
If you only need the core second-display experience, or compatibility that the OpenDisplay project serves better, OpenDisplay is well worth a look. MeowDisplay is developed and released independently of it (BRANCHING.md, REFERENCE.md).
MeowDisplay is intended for devices you own or are authorized to use. Don't use it to watch, access or control someone else's device without their permission.
MeowDisplay is licensed under GPL-3.0. It began as a fork of OpenDisplay by Philip Poloczek, which provided the original display, capture, encoding and receiver foundation. Original work Copyright (c) 2026 Philip Poloczek; this fork's changes are contributed under the same license. If you distribute a modified version, it must remain open source under the same license with attribution intact.
Independent open-source software, not affiliated with Apple.
Made by raiseCatError
Made with love, meows & purrs.